How do I change the templates for Call List E-Mails?
Call List E-Mail
Note that there are two types of e-mails being sent to patients, regarding their appointments:
•Appointment Reminder E-Mails
•Call List E-Mails
Appointment Reminder E-Mails
This is a simple reminder coming from the appointment itself. With the appointment open, clicking
‘Send’ will send either a text message or e-mail to the patient, reminding them about the
appointment. There is no template for this reminder - it is a simple statement of the appointment.
Call List E-Mails
This e-mail is generated from the Appointment Book, as opposed to a single appointment. It is used to
generate a list of patients that will be seen for the given day or week, and can be used to record
how the patient was contacted, when confirming the appointment.
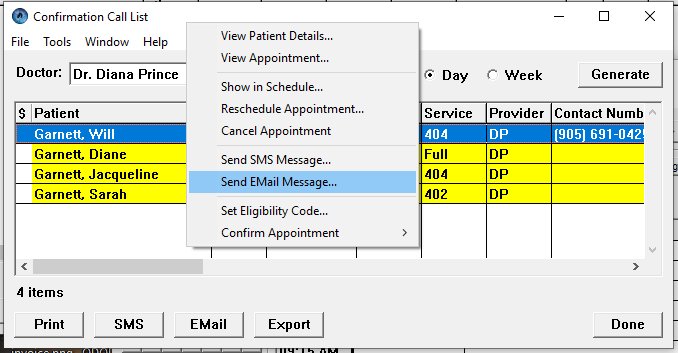
From this screen we can also generate e-mails, either individually (right-click on the patient and
select ‘Send E-Mail Message…’)
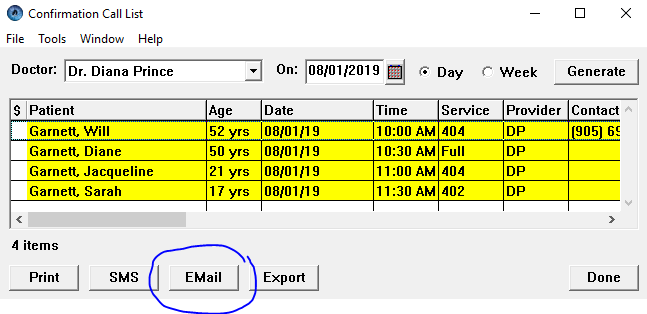
or as a group (click on the ‘E-Mail’ button at the bottom of the page).
Send E-Mail to a Group
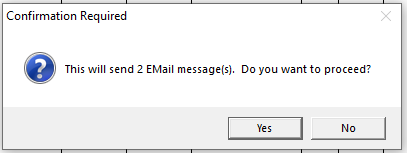
If you choose to send the e-mail as a group, the program will look through the patients in the list,
and find those with a valid e-mail address. You will then get a confirmation box:
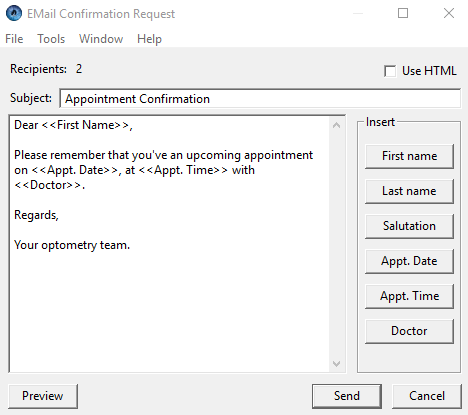
If you choose to proceed, you’ll see the ‘E-Mail Confirmation Request’ window. It is from this window
that you can access different templates, to either use or modify.
‘E-Mail Confirmation Request’ window
First, open up the ‘E-Mail Confirmation Request’ window, as shown above.
If you have ZERO templates…
...you will be shown the Template Selection window. Just hit the ‘Select’ button, and you’ll be
brought back into the ‘E-Mail Confirmation Request’ window where you can start entering in your first
Confirmation E-Mail template.
If you have ONE template...
...that template will be selected, and you’ll start immediately in the ‘E-Mail Confirmation Request’
window, where you can choose to edit the existing template or send the e-mails out by clicking on the
‘Send’ button.
If you have TWO OR MORE templates...
...the list of templates will be presented to you. Select the template you’d like to use, and click
the ‘Select’ button. You’ll go back to the ‘E-Mail Confirmation Request’ window, and you can continue
as before.
Working with Templates
To use the template as is, just click the ‘Send’ button.
To change the template for this time only, modify the template as needed, and click the ‘Send’
button.
To change the template and keep the changes, modify the template as needed, right-click in template,
and click the ‘Save message…’ option.
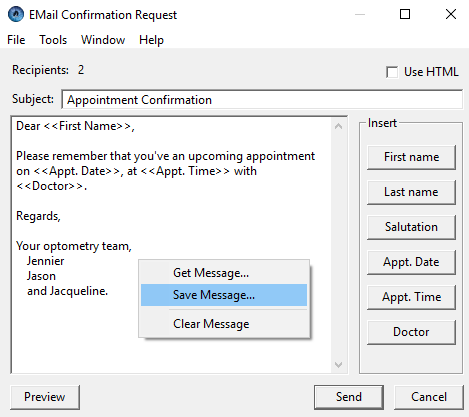
The following selection window will appear:
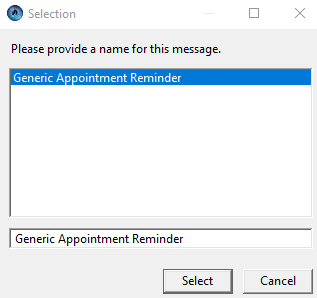
If you want to update the existing template, just hit the ‘Select’ button.
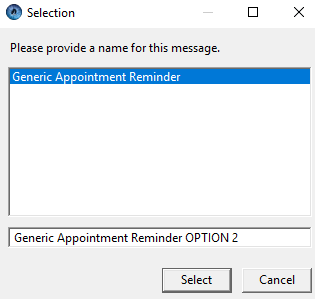
To save the changes as a new template, just change the name of the template in the text box to a new
name before you hit the ‘Select’ button.
Return To Top of Page